


Quick Tip: Spreading Resin and Sealant
Here's a helpful tip to anyone who has trouble getting nice smooth results when applying epoxy or polyester resin, fillers, or polyurethane sealant in tight places. For tiny corners, it's often difficult to use sandpaper after your adhesive has hardened - and it's often tempting to just use your finger to smooth out bumps or create rounded corners.. but the adhesive will stick to your finger or glove and often end up looking worse.
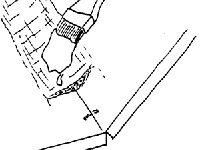
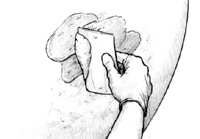
When using resin or sealant, keep some liquid dish soap handy! A tiny drop on the end of you finger can allow you to smooth out the results and clean up the edges. For rounded inside corners (around the cockpit floor for example), consider using the edge of a disposable spoon.
Repair Resin: Polyester or Epoxy?
Quite simply, use epoxy for all repairs instead of polyester, unless you will be using gel coat to finish the job. Epoxy sticks to just about anything but polyester sticks best to polyester (and doesn't stick very well to epoxy). Since gel coat is polyester based, do not apply gel coat over an epoxy repair - use a polyurethane primer/paint instead! If you must use gel coat, then perform your repair using polyester resin.
Polyester is cheaper but is brittle and not as strong as epoxy. Plus, it's probably worse for your long term health if breathing in fumes or sanding residue.
How to Repair Fibreglass: A Quick Overview
Basic Requirements
- Resin & Hardener (poyester or epoxy-based, see above)
- Fibreglass cloth or mat
- Fillers (adhesive filler and fairing filler)
Other Requirements
- Core materials (wood, closed cell foam, balsa, polystyrene/styrofoam)
- PVA mold release
- Top coat (paint/gel coat)
- Mixing cups
- Brushes
- Gloves
- Sandpaper
- Putty knives/plastic spreader
- Face mask, eye protection
As an over-simplification, there are 4 types of jobs requiring polyester or epoxy resin, listed below in sequence of how they are usually performed. For instructional videos, scroll down!
For in-depth instructions, visit these sites!
- West System Epoxy - product guides and instructions
- Interux Epiglass Epoxy - product guides and videos
 |
Laminating (Layering) - Adhering a layer of fibreglass cloth to a surface using a polyester or epoxy resin. Cloth is used to repair huge surface areas, build entire boats, create planks or patching areas larger than 1 square inch (approx). If repairing a large, thick area, normally a laminate will have a core material (wood, foam) sandwiched by layers of fibreglass (adhered by epoxy), using a variety of weaves and cloth weights. *For laminating panels, thicken the resin mixture with an adhesive filler to the consistency of ketchup. |
 |
Filleting (Bonding) - Adhering a chunk of material to a surface, such as a buttress, or connecting two surfaces, such as creating a box. Normally pre-mix your resin and add an adhesive filler to create a thick, mayonnaise-like consistency (for general filleting) or peanut butter-like consistency (for bonding uneven surfaces). *If injecting with a syringe, you may want to use a mixture with a thinner ketchup-like consistency. |
 |
Filling - Fill gaps and repair deep gouges using a resin mixed with an "adhesive filler", creating a peanut butter-like consistency. Apply with a putty knife or plastic spreader. Adhesive fillers are powders that consist of tiny irregularly-shaped microsopic fibres which grip each other and the surface you're working on. Adhesive filler offers excellent adhesion but are hard to sand - don't fill the gap all the way, leave your repair a "bit low" and use a fairing mixture (below) to fill up the rest!
|
 |
Fairing (Smoothing) - After fibreglassing and filling, create a smooth surface free of irregularities by mixing resin with a "fairing filler", creating a peanut butter-like consistency which can be applied with a putty knife or plastic spreader over a large area. Fairing fillers are powders that consist of tiny fibres - often spherical in shape. These fibres are not designed to provide much adhesion to each other or the surface you are working on. Instead, they provide a medium which is easily sanded after hardening. Scrape the mixture over the area, let harden, and sand with a long-board with high grit paper (increase incrementally from 90 to 400 or more) to create perfectly smooth surfaces ready for painting. |
Instructional Videos:
The following videos are videos we found on YouTube that simply outline the procedure of repairing fibreglass. There are amazing resources on the Internet to help you along the way, and we can certainly provide advice as well! Although these videos are some of our favourites, we do not endorse or take responsibility for anything on YouTube! Refer to your resin manufacturer's instructions for the last word!
|
Laminating |
|
Filleting/Bonding |
| Filling/Fairing |